Ice Climbing Taster Course: What to Expect on Your First Day on the Ice
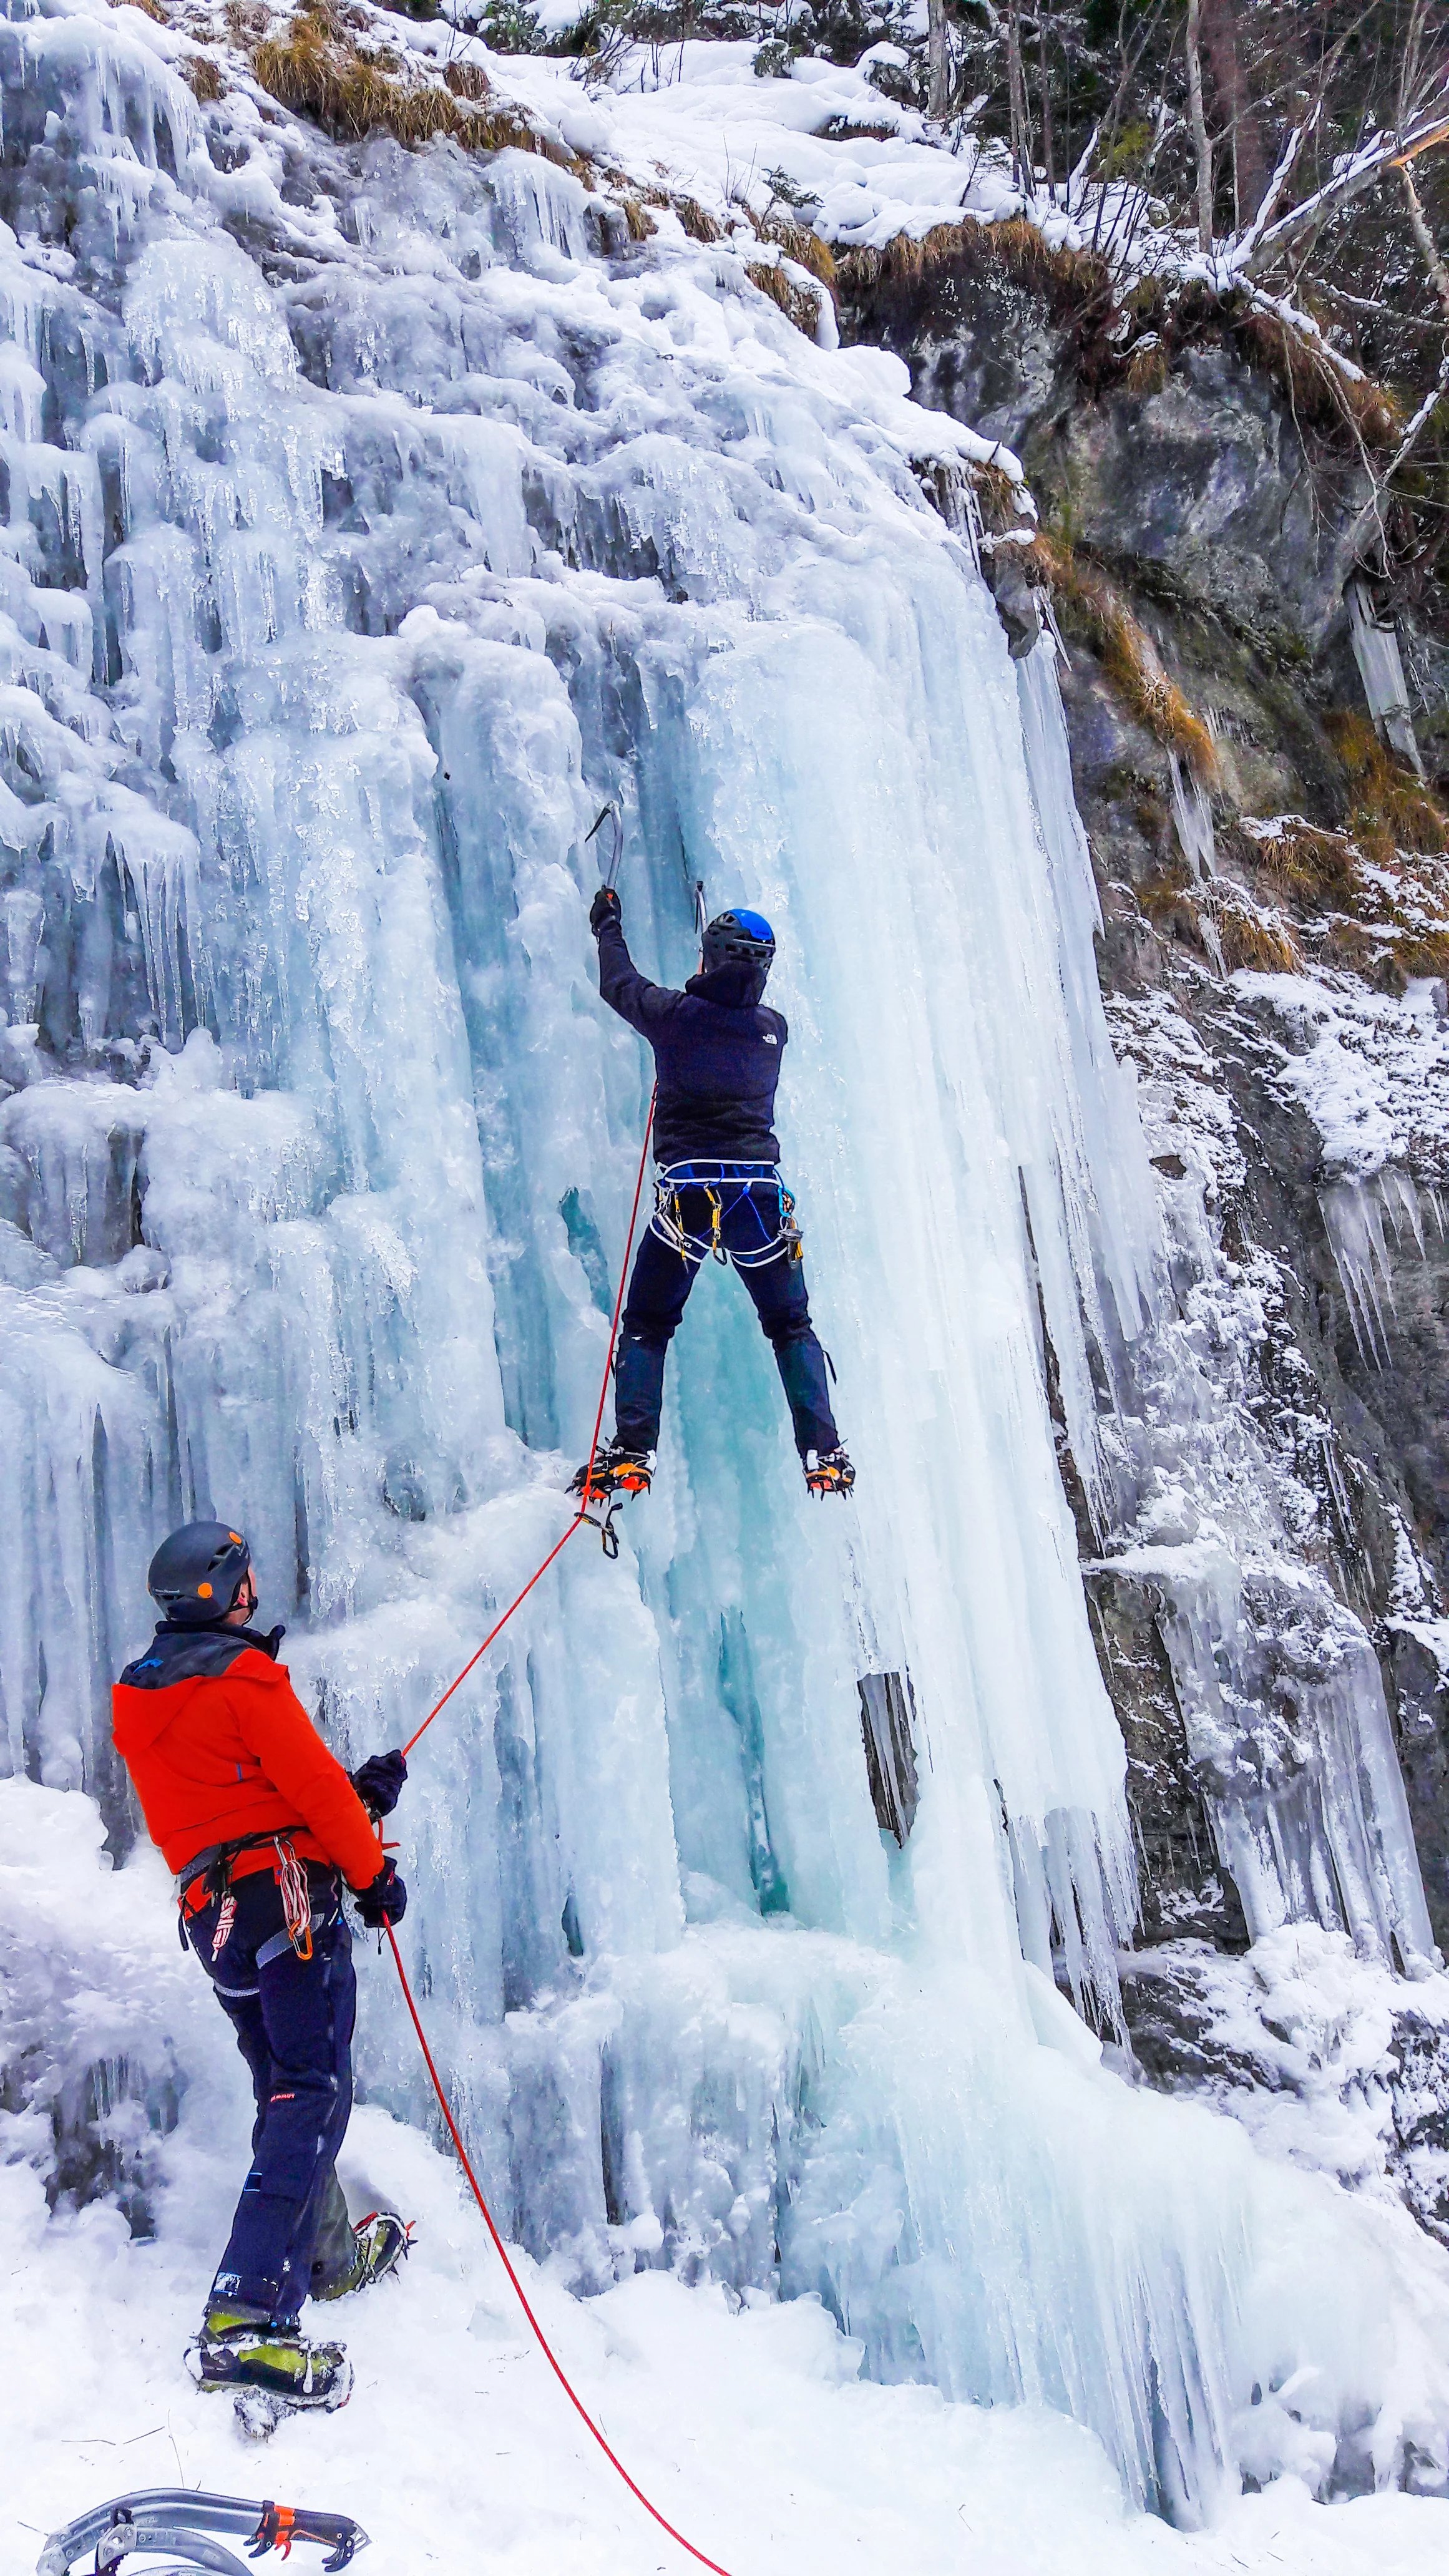
You're standing in front of a vertical ice wall. An ice axe in one hand, crampons on your boots, a knot on your harness that nobody had shown you an hour ago. You lift the axe, swing, hear the dry "tock" when the tool bites. That's the moment you realise: learning ice climbing isn't a myth. It's a craft.
This article describes what happens during the taster course, what you need to bring, and why a single day is enough to know whether you want to take it further.
Loading video player...
What it is
The Ice Climbing Taster Course is a one-day course for beginners. The goal: get to know the gear, build basic technique, climb on top rope, understand belaying. No prior experience required, but you need to be sure-footed and have decent baseline fitness.
Duration | ca. 8 hours |
Difficulty | Beginner |
Requirements | Sure-footed, general fitness |
What you can do by the end | Walk in crampons, set an ice axe, belay on top rope, tie a figure-eight, basics of ice screws |
Season | December to March |
Where the course takes place
The taster course normally runs on a frozen waterfall near Grindelwald. But ice climbing depends on ice, and ice depends on the weather. When conditions don't allow a clean setup, the mountain guide moves the course. On the day this report is based on, that was the case. The conditions in Grindelwald didn't allow proper belaying, so the bus went to Engstligenalp in the Adelboden backcountry. There's an artificial ice wall there: comparable technique, more reliable conditions, same learning effect.
Don't read that as a fallback. It's how ice climbing works. The mountain guide decides in the morning, sometimes only at the meeting point, whether the plan holds or you relocate. If you turn up fixated on a specific wall, you lose the day. If you turn up wanting to learn ice climbing, you learn it.

How the day unfolds
Meeting point and gear You meet early in the morning. If the day leads to Engstligenalp, the OUTDOOR van leaves Grindelwald, picks you up along the way or at the Unter dem Birg gondola base. Harness, ice axe, crampons, helmet, belay device and carabiner are handed out there, along with your gondola ticket and the entry pass for the ice wall. If you don't own mountaineering boots, you can rent them at the shop.
Up the gondola You can only reach Engstligenalp by gondola. On the ride up, you see the waterfalls people usually climb on, frozen or half frozen, depending on the season. The plateau at the top is high, the wind is colder, the view is wide open.
Gearing up and learning to walk Before you climb, you learn to walk. Crampons aren't hiking-shoe accessories, they need to be guided differently than a regular boot. The mountain guide shows you front-pointing and the side-step technique, you practice on flat ice until it starts to feel natural. Sounds unspectacular. It's the foundation for everything that follows.
Axe technique The axe only works when you set it correctly. Too early, and you waste energy. Too late, and the tool slips. You learn where to swing (not into cracks, not on edges), how far to pull the axe before the next placement, and why two axes work better than one.
Knots and belaying Figure-eight knot, tie-in at the harness, HMS belay. Before you go on the wall the first time, you belay the mountain guide on the ground. He checks every knot. Even on the tenth try. That's standard, not suspicion.
Top rope climbing Now you get on the wall. Top rope means the rope runs through a fixed anchor above, the mountain guide belays from below, a fall ends immediately. That's the safe variant. Safe doesn't mean harmless. You feel the height, you feel the cold, you feel how quickly your forearms pump out when you grip the axe too tightly. Most people make that mistake once. On the second try, the climbing changes.
A few routes There are different lines, easier and harder, longer and shorter. You pick what you want to try. The mountain guide watches, corrects your axe placement, calls out when you try to reach too high. After three or four routes, your body knows the movement.
Ice screws and Abalakov
Around midday, when your arms are tired, you get a choice. Either you keep climbing, with a focus on harder lines. Or you let the mountain guide show you ice screws and the Abalakov thread. That's the technique you use to build an anchor in the ice without leaving gear behind after you abseil. You drill two holes at a defined angle, thread cord through them, tie off. Sounds simpler than it is. If the angle is off, it doesn't hold.
Nobody expects you to do this on your own after one day. But you understand what's happening, and if you carry on, you have the picture in your head.
-xl.jpg?width=1600&height=896&quality=85&fit=cover&focalX=50&focalY=50)
Ice Climbing
What to wear
Functional, warm clothing in layers. A baselayer on the skin, an insulating layer, a wind- and waterproof shell. Pants that are robust and don't tear when the crampon point grazes them. Mountaineering boots with welts front and back (crampon-compatible). If you don't own them: rentable at the OUTDOOR Shop.
Gloves are their own science. Too thin, and you freeze while belaying. Too thick, and you feel nothing. Most people bring two pairs: thinner for climbing, thicker for the breaks. A beanie or headband is mandatory. Even under the helmet.
What to bring
- Backpack 25–30 litres
- Water bottle or thermos
- Snacks and a proper lunch (there's no official break, everyone eats in between)
- Sunglasses (the ice reflects more than you'd think)

Practical info
Parking at Engstligenalp cable car station is scarce in winter. The Unter dem Birg gondola base has a large parking area, in case the tour heads there. The gondola ticket and entry to the ice wall cost extra. Both are paid on site. Read more
If the course runs in Grindelwald at the waterfall, the setup is different: a short walk from the meeting point, no gondola surcharge. What doesn't change: the content, the gear, the mountain guides.
What you take away from the day
You know what ice climbing feels like. You know where your physical limits are. You've tied a figure-eight, climbed on top rope, set an axe that held. You receive a certificate of participation. It's not an official document, but a keepsake that shows you did the day.
Some people come once, find it interesting, go their own way. Others come back, book a follow-up course, climb their own lines later. Both are fine. The taster course exists so you can find out honestly which one applies to you.